kvm
KVM Switch for Mac: Dual Monitor Setup for Macbook, Mini, & Pro
Key Takeaways for Mac Dual Monitor KVM Setup with Avico
This guide walks you through setting up dual monitors with Avico's 2x2 KVM switch for Mac models, including Intel and Apple Silicon versions. It covers everything you need to know about choosing adapters, troubleshooting issues, and optimizing your workflow.
- Compatibility for All Mac Models: Covers Intel, M1, M2, M3, and M4 Mac models.
- DisplayLink Dock Support: Required for dual monitors with base-level M1 and M2 models.
- Product Recommendations: Links to Avico's Approved Adapter List and Recommended Accessories
- Hotkey Customization for Mac Keyboards: Adjustments needed for Mac users.
- Expert Support and Setup Guidance: Get expert personalized setup advice by filling out Avico's Intake Form.
Refer to this article if you are looking for a KVM Switch For Mac & PC.

Table of Contents
- Introduction: Simplify Dual Monitor Setup for Mac Users
- Understanding Dual Monitor Challenges for Mac
- Choosing the Right Adapters for Your Mac Dual Monitor KVM Setup
- Why Choose Avico's Dual Monitor KVM?
- Choosing the Right KVM Setup for Your Mac
- Addressing Bluetooth Device Limitations
- Hotkey Customization for Mac Keyboards in KVM Setup
- Troubleshooting Common Dual Monitor KVM Issues for Mac
- Conclusion: Get Your Mac Dual Monitor Setup Right
- KVM Setup FAQs for Mac Users
Introduction: Simplify Dual Monitor Setup for Mac Users
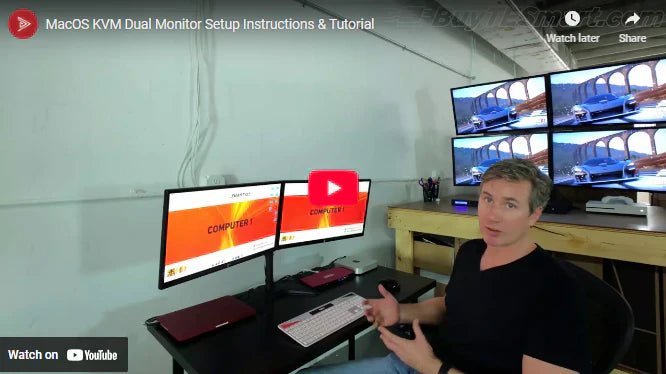
Setting up a dual monitor KVM for Mac is simple with Avico's 2x2 KVM switch. It connects two Mac computers to dual monitors and allows easy switching between them. Different Mac models require different ports, and M1/M2 models need extra steps to support dual monitors.
A personal note from Justin:
I originally created this video guide to help Mac users quickly set up dual monitors with TESmart's KVM. Since then, we've launched our own KVM and Apple has introduced their own Apple Silicon chips. I've adjusted the article below to reflect these changes, particularly nuances with the base level M1 and M2 chips. I've personally tested these setups to ensure this article gives you everything you need to get your Mac running smoothly with dual monitors and Avico's KVM.
Understanding Dual Monitor Challenges for Mac
Connecting dual monitors to a Mac depends on the model. Older Intel models support dual monitors without issues, but Apple Silicon models (M1, M2, M3, and M4) introduce specific limitations based on the chip version.
Intel Mac Models
- Dual Monitors: Support through Thunderbolt and HDMI
- Adapters Needed: Mini DisplayPort or USB-C adapters with Avico's KVM
M1, M2, M3, and M4 Mac Models
- Base-level M1 and M2: Only support one external monitor. For dual monitors, you'll need a DisplayLink dock to bypass the display engine limitation.
- M3 base models support two external displays in Clamshell Mode (lid closed).
- M4 base models support two external displays in addition to the built-in display, allowing for a total of three active screens.
- Higher-end Pro, Max, and Ultra models of M1, M2, M3, and M4 support dual or more monitors without additional hardware.
Mac Dual Monitor Support Grid
| Chip Model | External Monitors | Additional Requirements |
|---|---|---|
| Intel Mac | 2+ | Mini DisplayPort or USB-C adapter |
| M1/M2 Base | 1 | DisplayLink dock for dual monitors (needed because base models only have one display engine) |
| M3 Base | 2 (Clamshell Mode) | No additional hardware required |
| M4 Base | 2+ | No additional hardware required |
| M1 Pro/Max/Ultra | 2+ | No additional hardware required |
| M2 Pro/Max/Ultra | 2+ | No additional hardware required |
| M3 Pro/Max/Ultra | 2+ | No additional hardware required |
| M4 Pro/Max/Ultra | 2+ | No additional hardware required |
Choosing the Right Adapters for Your Mac Dual Monitor KVM Setup
Mac with Thunderbolt/USB-C: Macs with Thunderbolt or USB-C ports require the Avico USB-C to HDMI adapter or a similar approved adapter. Or if you have an older version, you can use the Avico Mini Displayport to HDMI adapter.
DisplayLink for M1/M2: DisplayLink docks allow base-level M1 and M2 models to support dual monitors by sending display data over USB, bypassing the native display engine limitation. Installing the DisplayLink Manager software is required for macOS to recognize and configure the additional displays. You can find recommended docking stations on Avico's Recommended Products Page.
Tired of researching? Skip the guesswork and get expert advice tailored to your exact setup.
Click Here For Our Intake FormWhy Choose Avico's Dual Monitor KVM?
Avico's 2x2 KVM switch is built specifically for Mac users who want a reliable dual monitor setup that just works. It supports a wide range of Mac models, handles both video and USB peripherals, and eliminates the need to unplug and replug cables.
To learn more about the product, see the Avico 2x2 Product Announcement.
Hybrid Mode
Control both computers at the same time using one keyboard and mouse. This is ideal for multitasking, monitoring both systems, or transferring files between Mac devices.
Dual 4K60 Support
Sharp, smooth video for professionals working with design, video editing, or development.
USB 3.0 and Audio Binding
Keeps your webcam, mic, and audio devices locked to one computer while switching displays.
Hotkey Flexibility
Multiple hotkey combinations to support Mac-specific needs.
Premium Chipset & Components
High-quality chipsets and cables ensure reliable performance. The KVM supports DisplayLink docks for base-level M1 and M2 models, providing seamless dual monitor functionality.
US-Based Support Team
Fast responses from real people who understand your setup.
Phone and Email Support
Talk to a real person if you're stuck or need help configuring.
Advanced Setup Tutorials
Videos, diagrams, and detailed guides available online.
Compatibility Confidence
Intake Form and Adapter List reduce trial and error.
Choosing the Right KVM Setup for Your Mac
Quick Setup Navigation
Jump to the section that matches your Mac model:
- Setup for Intel Mac Models
- Setup for M1 and M2 Base Models
- Setup for M3 Base Models
- Setup for M4 Base Models
- Setup for Pro, Max, and Ultra Models
Setup for Intel Mac Models
- Connect one monitor using an HDMI cable.
- Use a Avico Mini Displayport to HDMI adapter if your Mac has Mini DisplayPort.
- Use a Avico USB-C to HDMI adapter if your Mac uses Thunderbolt 3/4 or USB-C ports.
- Connect both HDMI and USB cables to the KVM to ensure full functionality.


Setup for M1 and M2 Base Models
- Connect one monitor using an HDMI cable.
- To enable dual monitor support, use a DisplayLink docking station to connect the second monitor.
- Download and install DisplayLink Manager to allow macOS to recognize and configure the additional display.
- Use Avico's Recommended Products Page to find a compatible dock.

Setup for M3 Base Models
- Connect one monitor using an HDMI cable.
- M3 base models support dual monitors, but only in Clamshell Mode (lid closed).
- Use the appropriate Avico USB-C to HDMI adapter.

Setup for M4 Base Models
- Connect both monitors using HDMI cables.
- M4 base models support two external monitors while keeping the built-in display active.
- Use the appropriate Avico USB-C to HDMI adapter.

Setup for Pro, Max, and Ultra Models (M1, M2, M3, M4)
- Connect both monitors using HDMI cables.
- Higher-end models support dual monitors natively without additional hardware.
- Use the appropriate Avico USB-C to HDMI adapter.
- Ensure all connections are secure and properly configured.

Tired of researching? Skip the guesswork and get expert advice tailored to your exact setup.
Click Here For Our Intake FormAddressing Bluetooth Device Limitations
KVM switches do not support Bluetooth-only devices like the Apple Magic Mouse, Magic Trackpad, or Magic Keyboard. This is because Bluetooth connections are tied directly to the host device, not the KVM.
Recommended Alternatives
To maintain seamless switching between devices, use a wireless keyboard and mouse that connect via a USB receiver rather than Bluetooth. Avico recommends the following:
- Logitech MX Keys for Mac: Reliable, Mac-optimized keyboard with a USB dongle.
- Logitech MX Master 3S for Mac: High-performance mouse designed for Mac with multi-device support.
Why USB Receivers Work Better
USB receivers pair with the KVM switch, allowing seamless switching between connected devices. Bluetooth-only peripherals remain tied to a single device and won't switch correctly when using a KVM. If your wireless USB mouse and keyboard are not acting reliably, use an inexpensive USB extender to get the USB receiver out from behind the KVM.
Hotkey Customization for Mac Keyboards in KVM Setup
Mac keyboards don't have a Scroll Lock key (commonly used by KVM switches), so you'll need to customize your hotkeys. Full list of KVM Hotkey Commands
Mac Hotkey Setup Guide
| STEP | ACTION |
|---|---|
| 1. Access Settings | Press Scroll Lock + Scroll Lock + H to enter hotkey configuration mode. |
| 2. Choose New Hotkey | Select a Mac-friendly alternative like Command + Command or Ctrl + Ctrl. |
| 3. Save Changes | Your selection is automatically saved once you choose the trigger. |
Recommended Mac Hotkey Combinations
| COMBINATION | FUNCTION |
|---|---|
| Ctrl + Ctrl + 1 | Switch to Computer A |
| Ctrl + Ctrl + 2 | Switch to Computer B |
| Command + Command + 3/4 | Activate Hybrid Mode |
| Alt + Alt | Switch between computers in Hybrid Mode |
Troubleshooting Common Dual Monitor KVM Issues for Mac
Issue: Only One Monitor Is Displaying
| FEATURE | BENEFIT |
|---|---|
| Confirm Both Video Inputs Are Connected | Some users only connect one HDMI cable, assuming it's enough. Dual monitor KVMs require two HDMI cables from each computer to the KVM. |
| DisplayLink Not Installed (M1/M2) | If you're using a DisplayLink dock with an M1 or M2 Mac, you must install DisplayLink Manager or macOS won't detect the second monitor. |
| Mac Display Settings Need Manual Setup | macOS may not auto-detect displays. Open System Settings > Displays, click "+" or "Detect Displays," and manually arrange them. |
| Incorrect Adapter Used | Using a random Avico USB-C to HDMI adapter from Amazon often causes issues. Check Avico's Approved Adapter List to verify compatibility. |
Issue: Video Signal Is Flickering or Cutting Out
| Problem | Solution |
|---|---|
| Cable Quality or Length Is the Cause | Use certified HDMI 2.0 cables no longer than 15 feet to ensure stable 4K60 performance. Longer or unshielded cables may cause flickering or blackouts. |
| Bandwidth Exceeded | If you're running 4K monitors at 60Hz with long cables and multiple adapters, you're likely pushing the bandwidth limit. Test lowering the refresh rate to 30Hz or switch to shorter cables. |
| Incompatible Adapter Bottleneck | Not all USB-C adapters pass full 4K60 signal. Use only adapters from the Approved Adapter List. |
Issue: USB Devices Not Switching
| Problem | Solution |
|---|---|
| USB Cable Is Missing or Not Connected Properly | Dual monitor video will still pass through the KVM even if the USB data cable is not connected. But your mouse, keyboard, webcam, or mic will not switch. Confirm the USB Type-B cable is plugged into both the KVM and your Mac. |
| Wireless USB Dongle Is Obstructed | Plug the USB receiver into the front USB port or use a short USB extension cable to move it out from behind the KVM if you're experiencing lag or dropouts. |
| Bluetooth Devices Won't Switch | As explained earlier, Bluetooth-only devices like Magic Mouse and Magic Keyboard do not work with any KVM. Use devices with a USB receiver. |
Conclusion: Get Your Mac Dual Monitor KVM Setup Right
Setting up a KVM can be tricky with different Mac models.
Fill Out the Intake Form and Get Expert Setup Advice Today!KVM Setup FAQs for Mac Users
No, KVM switches do not support Bluetooth-only devices like the Apple Magic Mouse or Magic Keyboard. Use a wireless mouse and keyboard with a USB receiver for seamless switching.
Base-level M1 and M2 models only support one external monitor. To enable dual monitor support, use a DisplayLink docking station and install DisplayLink Manager for macOS. Refer to our Recommended Accessories page for docking stations we've tested.
For 4K60 video, use certified HDMI 2.0 cables no longer than 15 feet to avoid signal degradation or flickering.
Yes, you'll need a compatible adapter depending on your Mac model. Use the Avico USB-C to HDMI adapter for modern Macs or the Mini Displayport to HDMI adapter for older Intel models.
Confirm that the USB cable is properly connected between the KVM and your Mac. If you're using a wireless mouse and keyboard, make sure they are connected via a USB receiver and not Bluetooth. Check out the full KVM Switch Mouse And Keyboard Not Working
KVM Hotkey Commands are keyboard shortcuts that let you switch between connected computers without pressing a button on the KVM itself.
Most KVMs use the Scroll Lock key by default, but Mac keyboards don't have this key, so adjustments are needed.